Runpod offers multiple storage options that has some initial confusing nuance. This guide explains the fundamentals of Pod storage, network volumes, and how these concepts apply to different deployment types.
Pod storage
When you launch a Pod, you are generally asked to set up two primary configurations:
- Container disk.
- Volume disk.
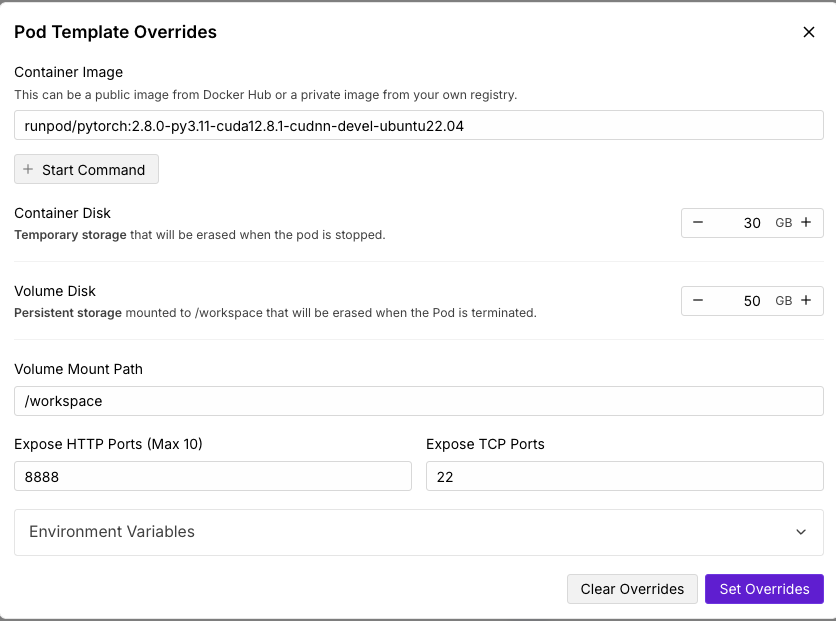 Pod storage configuration showing container storage, volume storage, and volume mount path settings
Your docker image defines the files and directories that your Pod will have. By default, the
Pod storage configuration showing container storage, volume storage, and volume mount path settings
Your docker image defines the files and directories that your Pod will have. By default, the volume mount path defines what the Pod will consider as a local persistent storage, meaning that any file that you create or your Docker image put under that folder will be persisted throughout the Pod’s lifecycle until you terminate the Pod. What this means is that if you stop a pod, then start it, only the /workspace will be persisted and everything else will be reset to it’s base-state from the Docker image.
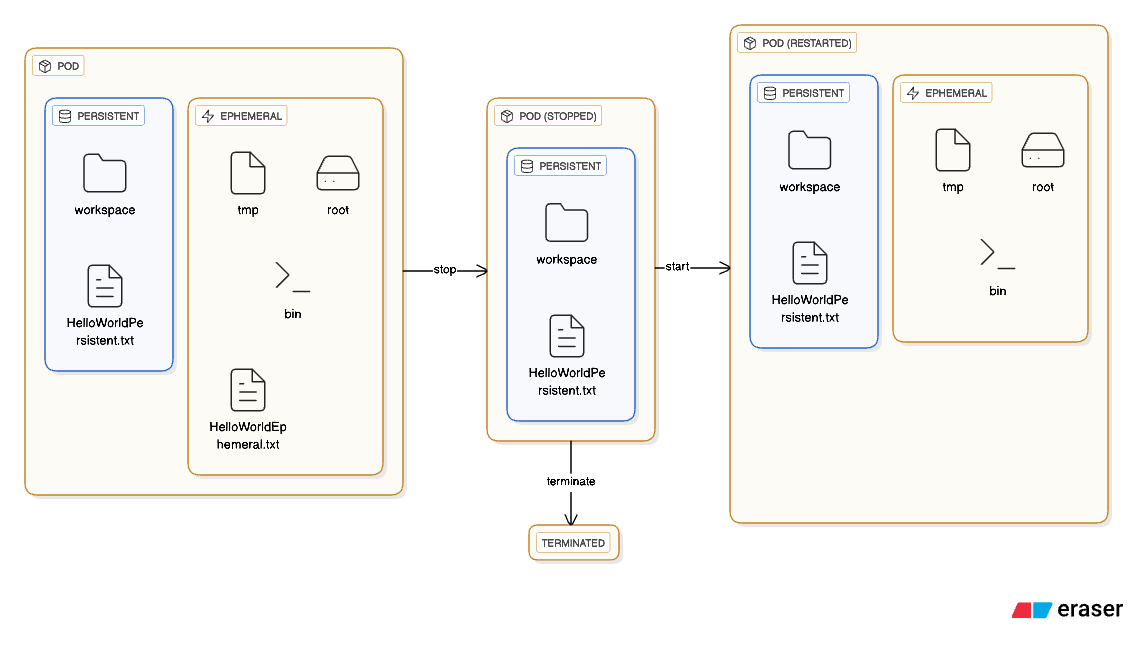 Lifecycle example of Pod storage showing how data persists in the volume mount path
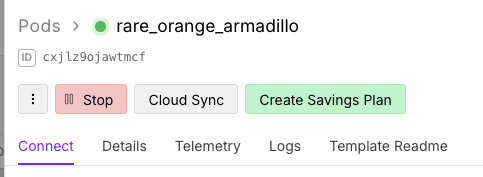 Example of the Stop button for stopping a running Pod
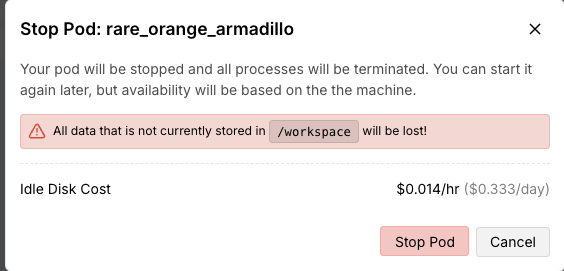 Warning message displayed when stopping a Pod - data outside the persistent local storage path will be discarded
 Options available after stopping a Pod - users can choose to Start or Terminate the Pod
Pod storage with network volumes
Network volumes provide persistent, shareable storage through MooseFS, a distributed file system that functions like a detachable hard drive for secure pods. Unlike standard volume disks, network volumes persist beyond a Pod’s lifecycle and enable efficient storage of large files without bloating your Docker image.
 Example of how many pods can attach to a network volume
Key benefits
Multi-Pod Access: Network volumes can be attached to multiple Pods simultaneously, functioning as a shared drive accessible across your infrastructure.
True Persistence: Data remains intact even after Pod termination. When you create a new Pod, you can reattach the same network volume and access all your files immediately.
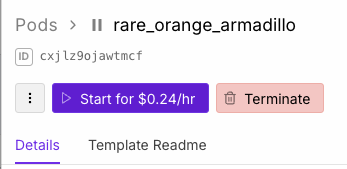
Simplified Pod Management: Pods with network volumes only display a “Terminate” button (no “Stop” option) because your data is always safe in the network volume. This eliminates the risk of data loss that exists with standard volume disks.
GPU Availability: Network volumes provide flexibility when GPU availability changes. If you stop a standard Pod and the original machine’s GPUs become unavailable, you might get stuck with zero GPUs. With network volumes, you can simply terminate and launch a new Pod on any available machine with GPUs. Learn more about zero GPU situations.
Limitations
Limited GPU Availability: Not all GPU machines support network storage. You may notice GPU availability decrease when selecting network storage, as only specific machines in a data center have network volume support.
Regional Lock-in: Network volumes are bound to specific regions. During peak traffic periods, this regional constraint may limit your access to certain GPU types within your network storage region. There are some mitigations that will be discussed later.
Storage Overhead for Small Files: MooseFS uses a chunk-based storage system with minimum chunk sizes. This means small files consume more storage than their actual size, leading to inefficient storage utilization for many tiny files.
Network Latency: As a distributed file system, MooseFS operations traverse the network, introducing latency. Meaning that I/O operations will be slower versus local read/writes.
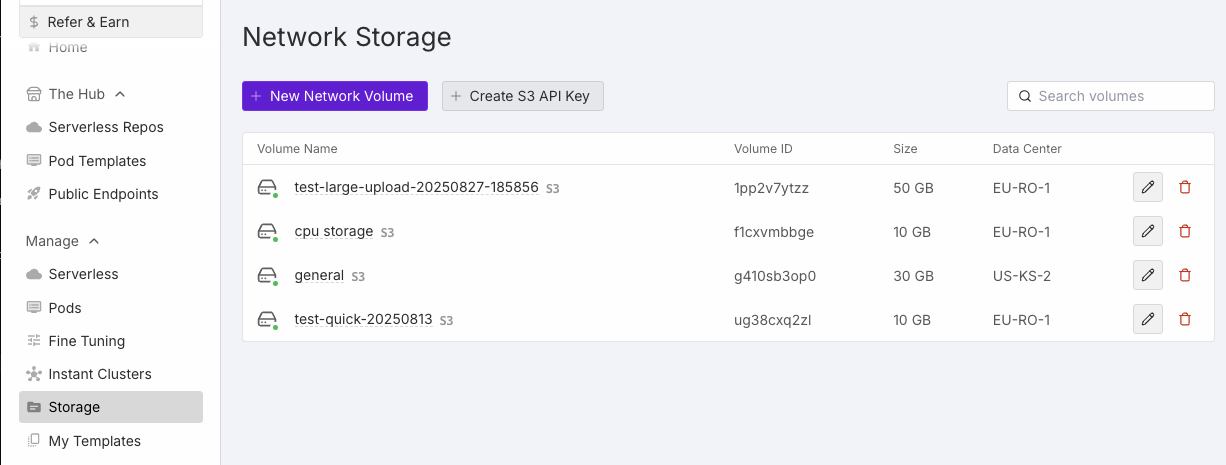
How to create network storage
To create network storage, navigate to the storage section on the left side to create and view your existing network storage.
 Navigate to the network storage section in the Runpod console
 Network storage creation interface showing configuration options
Maximize data access flexibilityWhen creating network storage, consider selecting regions with:
- S3 API support: Access your data directly via S3-compatible APIs without needing to spin up a Pod.
- CPU availability: Use cost-effective CPU Pods as intermediary instances for data processing, transfers, or syncing to external systems.
This combination ensures you always have affordable fallback options for accessing and managing your data. How to use network storage with Pods
Once your network storage is created, you can attach it when creating or editing a Pod.
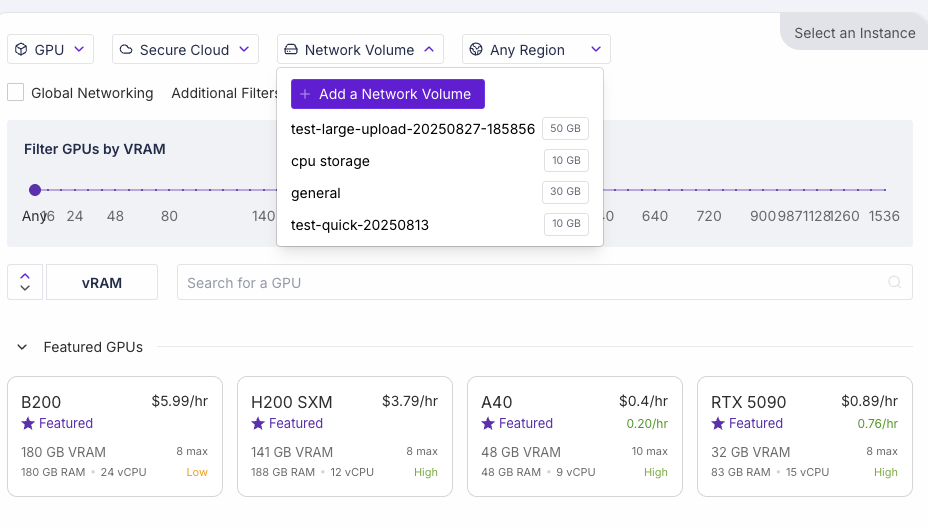 Select your network storage when creating a new Pod
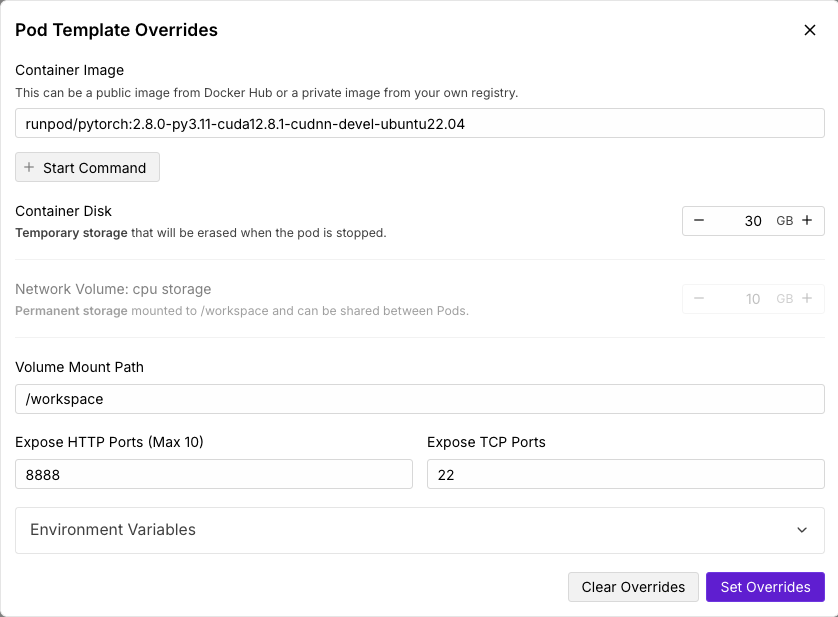 Network storage configuration in the Pod edit interface
Volume mount hides Docker image filesMounting a network volume will hide any existing files at the mount path in your Docker image. If your Docker image contains pre-initialized files in /workspace, these files will become inaccessible when you mount a network volume to the same path—only the network volume contents will be visible. The original files remain in the Docker image but are hidden by the mount.Solution: If you need access to Docker image files, modify the volume mount path to use a different directory (e.g., /data or /storage) instead of /workspace.
Serverless
Serverless operates similarly to Pods with two key differences. First, you can only allocate container storage because Serverless instances are ephemeral. They spin up on demand for each request and terminate afterward. Second, Serverless mounts network storage at /runpod-volume by default. If you need the mount at /workspace or another location, adjust your deployment configuration accordingly.
When selecting network volumes for Serverless, choose regions with high availability for your target GPU types. We recommend selecting at least two GPU types to provide failover options, since network volumes are region-locked. Alternatively, consider embedding dependencies directly into your Docker image for better performance and availability.
When to use network storage
Network storage excels at persisting files across sessions and storing large ML models. However, choosing between network storage and Docker images requires careful consideration of your performance requirements.
For optimal performance, we recommend baking ML models and dependencies directly into your Docker image when possible. Local files eliminate network latency and provide faster I/O operations during model execution.
When network storage makes sense
Consider network storage when:
- Model size exceeds practical limits: Models too large for Docker images (>30GB).
- Rapid iteration needed: Faster deployments without rebuilding Docker images.
- Dynamic data loading: Flexibility to update models or datasets without redeployment.
For I/O-intensive operations, you can optimize performance by copying files from network storage to local directories outside the mount path. For example, store compressed datasets in network storage, then extract them to local storage for processing.
Optimize file storageWhen storing thousands of small files, compress them into archives (.tar.gz or .zip) before uploading to network storage. This approach:
- Reduces storage overhead from MooseFS chunk sizing.
- Speeds up file transfers.
- Simplifies file management.
Common storage issues
Storage capacity exceededYou may encounter storage capacity warnings even with large volume storage or network storage. For example:
- Your Docker image size: 30 GB
- Container storage allocated: 5 GB
- Volume storage or network storage: 100 GB at
/workspace
In this scenario, the 30 GB Docker image exceeds the 5 GB container storage limit. Files stored outside the /workspace mount path count against container storage, not network storage. This means system files, installed packages, and any data outside /workspace can quickly fill the limited container storage.Solution: Increase your container size to accomodate your Docker image size.